Overview
Table of Contents
If you are a newbie, I will tell you what a gig is on Fiverr. Fiverr is a well-known online marketplace where freelancers offer their services in various categories. A gig on Fiverr refers to a service or task that a freelancer offers to perform for a fee. These services range from graphic design and writing to digital marketing and programming.
What is Fiverr?
Fiverr is a marketplace where you can earn money. Fiverr is not only an online selling market. You can purchase any service here. Buyers and sellers both visit this platform for their own needs.

What is a gig on Fiverr?
The gig word comes from job, product, and service. A gig means you can sell your products or services. In other words, you can do a job for your client.
Gig extracts are used for providing different services to clients. If any marketplace fixes a specific service gig, then it cannot survive for a lifetime.
On the other hand, the service provider also cannot survive on one skill. Therefore, Fiverr permits creating gigs more and more. If you are a beginner, then you can create only 7 gigs in the beginning.
How do I create a Fiverr gig step by step?
Before creating a gig on Fiverr, the Fiverr account is compulsory. If you do not have a Fiverr account, then first make one. After creating a Fiverr account, you will convert it into a seller account.
After completing the Fiverr account, you can now create a gig. To create a gig, you click on the selling option. After clicking, you will click on the gigs option.
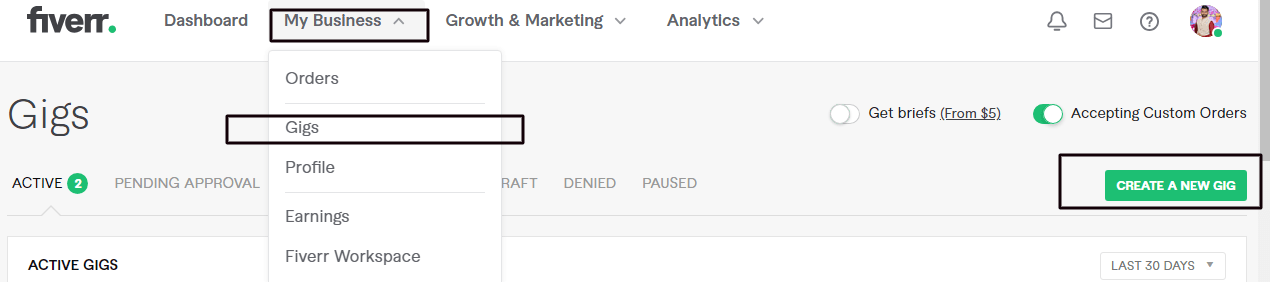
1. Click on create a new gig Option
If you have not had any gigs before, then click on the right-side option to create a new gig. As you can see in the picture.
- Over view
The first option will be open for gig titles. It is the first and most important part of your gig. You will choose your gig title according to your services.
- Category
After selecting the title, you will select the category according to your service.
- Meta Tags
In the end, after selecting the category, you will give the title tags according to your services.

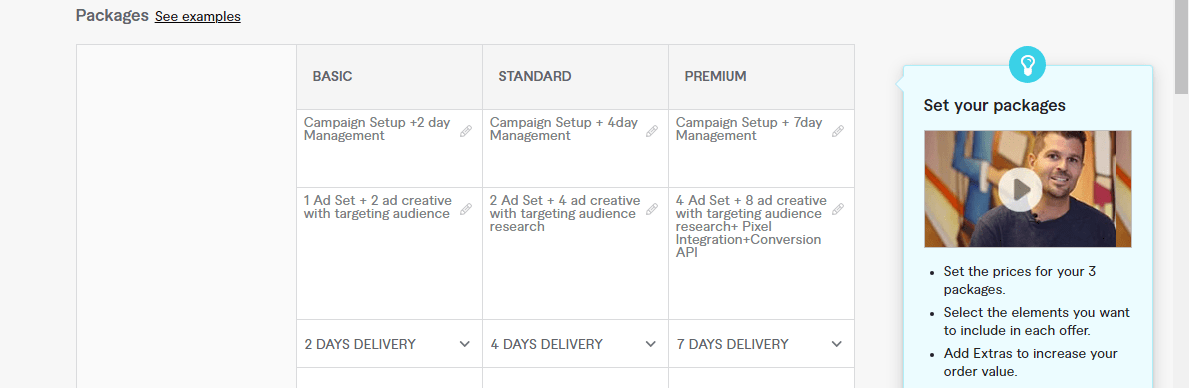
2. Pricing Fixing
The second option will be open after the overview. In this option, 3 steps will be provided for the pricing of your service. According to services, you will put your pricing columns.
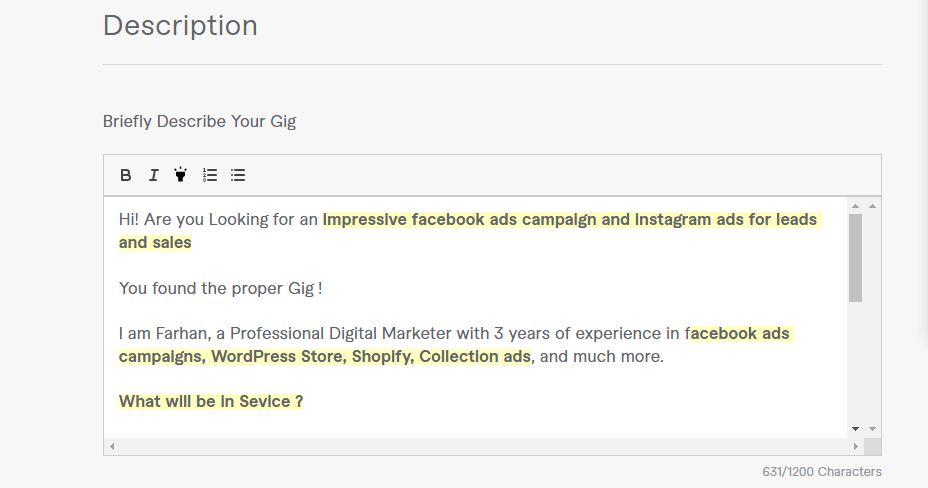
3. Gig Description & FAQ
The second most important part of the gig is the description & FAQ. A gig description means you will briefly tell about your gig. The client will give you an order to view your gig. Therefore, when you create your gig, your gig description must be strong.
Some of the following points must be known about gig descriptions:.
- There is no keyword stuffing.
- No copy description of any other freelancer.
- Don’t mistake the spelling in your description.
If you follow these steps, Fiverr will not ban your account. Otherwise, Fiverr can ban your account if you break the rules.
4. Requirements
The fourth step is requirements. In this step, you will be asking the client some questions before starting work. We ask these questions to avoid disputes in the future.

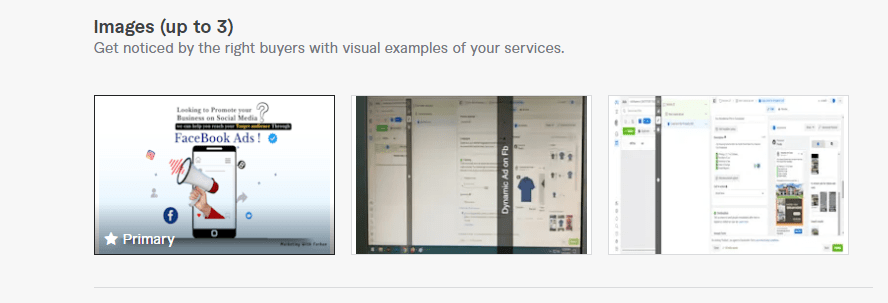
5. Gallery & Images
In this option, you will upload any video or image according to your service. The image or video has a good impact on the client’s decision to make an order.
6. Publish the Gig
It is the last step in creating a gig. After all the steps are complete, you will click on the publish button. Now your gig is published.
Conclusion
In short, I hope you can create a Fiverr gig. Therefore, I described all the necessary steps for creating a gig. Anyone can create a gig with the help of these steps.

Blogger | SEO Expert | Social Media Marketer
👩💻 Hi there! I’m Farhan Ansari, a passionate blogger on a mission to share my thoughts and insights with the world. 🌍✨
📚 I’m a lifelong learner, constantly exploring new ideas and experiences. Join me as I dive into various topics, from tech trends and travel adventures to personal development and beyond.
🤝 Let’s connect, learn, and grow together. Don’t hesitate to drop a comment or reach out—I love engaging with my readers!
🌟 Thanks for stopping by, and welcome to my blog journey. 📝💕